These are the four steps we need to take to handle an event declaratively.
Define the View object, e.g., a Button that will trigger the user action
Choose which event you want to respond to, e.g., click or long-click. Note that some View objects can respond to a range of events, not only clicks; they may be able to respond to some other gestures too
Associate the event with a Java method. For example, if you wish to handle the click event, then associate the onClick attribute of the View object to a Java method (one that you will implement later)
Implement the Java method (inside the MainActivity class) which you associated with the event. The name of the method needs to match the same name you defined in the onClick attribute of the View object (in step 3 above)
Let’s see that in action. I will use Android Studio to create a sample project.
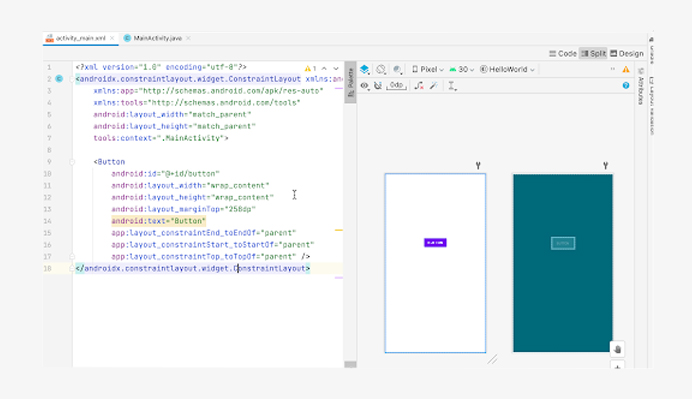
Once you’ve created an Empty Activity project in Android Studio, put a Button View somewhere in the Activity. You should have something that looks like this (figure 1)
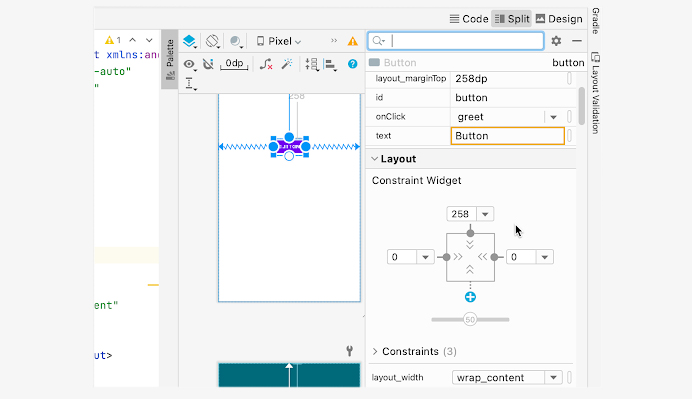
Next, select the Button, then go to the Attributes inspector (shown in figure 2).
figure 2. Attributes inspector
On the onClick attribute of the Button View, type greet (as shown in figure 2). If you look at the activity_main layout file in Code view, you should see something like the following code.
The android:onClick attribute is now equal to “greet”. This was automatically generated by the IDE when you set the oClick attribute to “greet” in the Attribute inspector.
Similarly, you can directly edit the XML code of the activity_main layout, and it will also reflect on the Attribute inspector. The update is bidirectional.
Filling up the entry of the onClick attribute means that you want something to happen when the button is clicked.
Now, whenever the user clicks our Button, the Android runtime will look for a method name void greet(View view) somewhere in our MainActivity class — which means we need to work on that next.
On the main editor of Android Studio, go to the MainActivity class and edit it to match the code listing below
You need to implement the greet method (as shown in the code above) so that when the user clicks the Button, the runtime finds our “greet” method and executes it.
NOTE While you are typing the code, some keywords may appear to be unrecognized. That is probably because you just haven’t imported the proper classes yet. Android Studio’s code inspection actions can help you fix that. If you hover your mouse over the unrecognized keyword (the ones with the red squiggly lines), then press option + ENTER (macOS) or Alt + ENTER (for Linux/Windows), Android Studio will automatically import the necessary classes for you.
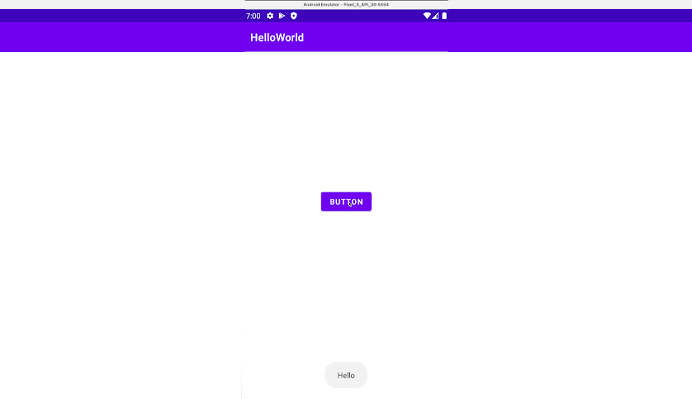
You can now run your project; figure 3 (below) shows our app at runtime when the button is clicked.
figure 3. our small app at runtime
Our example shows a simple Toast message that displays “hello” for a couple of seconds.
Programmatic Event Handling
To handle events programmatically, we do the following.
Define the View object that will trigger the action — just like how we did in declarative event handling
In the MainActivity class, declare a variable that will hold a reference to the Button View
Get a programmatic reference to the Button View
Create a listener object (you can choose from many) and set onClick listener of the Button to the instance of the listener object
Override the abstract onClick method of the listener object, and implement program logic there — that’s where you write whatever you want to happen when the user clicks the Button.
Let’s see that in action.
Create a new Empty project in Android Studio.
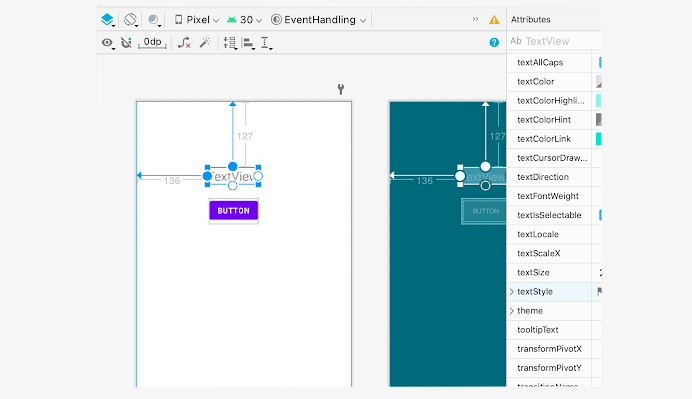
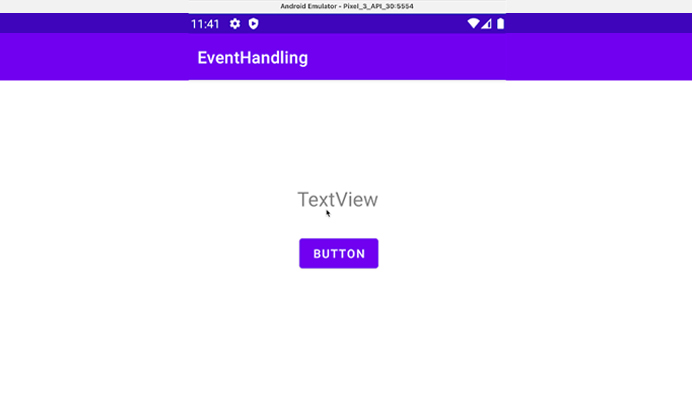
Delete the default “hello” TextView object. Then, put a Button and TextView objects in the layout, as shown in figure 4 (below).
figure 4. TextView and Button
You can style the View objects by selecting them then setting some of their attributes in the Attributes inspector.
For example, if you want to increase the size of the text in the TextView, you can increase its textSize attribute in the inspector.
Alternatively, you can also set the attributes directly by editing the XML code of the layout file (activity_main) — the code listing below shows the XML code for the layout file
As you can see, I changed the textSize of the TextView to “24sp”.
Next, we move on to the MainActivity class.
All of our event handling codes will be inside the onCreate() method of MainActivity — right after the setContentView() method — we need this method call to complete so that all the objects in the layout file finish the inflation process.
The inflation process creates all the View and ViewGroup objects as Java objects that we can then reference programmatically in the main program.
The whole exercise can be summarized as follows.
Get a programmatic reference to the Button view
Set a Listener object for it
Override the abstract method defined on the listener object and provide program logic in response to a user action
Getting a programmatic reference to the Button View can be done as follows.
Button btn = findViewById(R.id.button);
You may notice that as you type the statement above, Android Studio tries to infer and offer some auto-completion options.
Autocompletion can save you time in programming, and it gives you some confidence that you’re on the right track—if things don’t show up in autocompletion, it usually means you’re doing something wrong because Android Studio doesn’t recognize it.
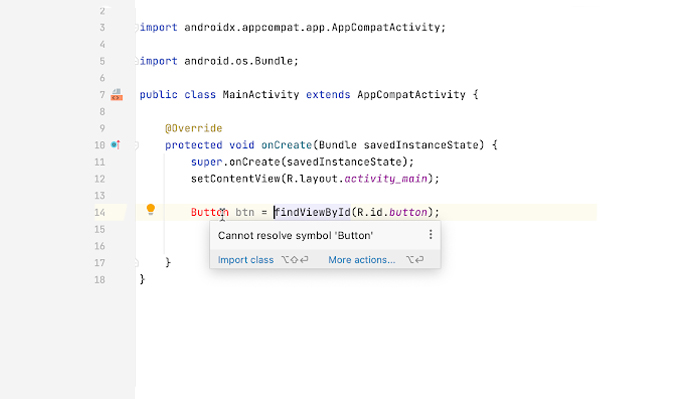
You may notice that the word Button is lit in red. If you place the caret on top of the words lit in red, the IDE will show you some information about why it thinks it’s a syntax error (shown in figure 5 below).
figure 5. Syntax error because of missing import
It’s a syntax error right now because we haven’t imported the Button class yet. You can write the import statements yourself, or you can use some code completion actions of Android Studio.
While the caret is still on the location of the “Button” token (lit in red), use the quick fix key — that is, option + ENTER (for macOS) or Alt + ENTER (for PC folks).
The code inspections can solve a variety of syntax-related problems, not only missing imports.
The next thing to do is to select a listener for the Button View; create a listener object for it, and override the necessary methods.
In our case, I will use an onClickListener object for the Button — because I’d like to listen to click actions — then, I’ll override the onClick() method of the listener object.
Here’s the code to register a listener for the Button and how to override abstract methods in the listener.
Notice that as you type the codes to create the listener object, Android Studio tries to help you by suggesting auto-completion options.
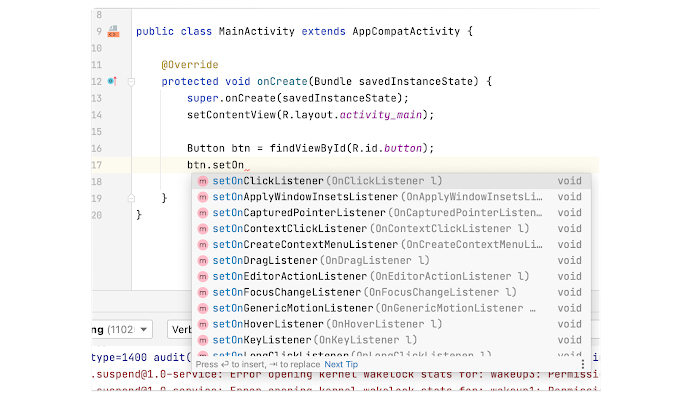
Figure 6 shows the several listeners I can use for the button — each listener is responsible for a unique action or gesture. As you can see from figure 6, the Button can listen to a variety of events.
It can listen to a drag gesture, a keyboard activity, a focus change (it detects if it has the current focus or not), etc.
figure 6. code hinting for setOnClickListener
You can use the up and down arrow (on your keyboard) to choose which listeners to use.
If you use the TAB key, the IDE will autocomplete the option that’s currently highlighted — which is what I did. When the focus was on setOnClickListener, I just pressed TAB.
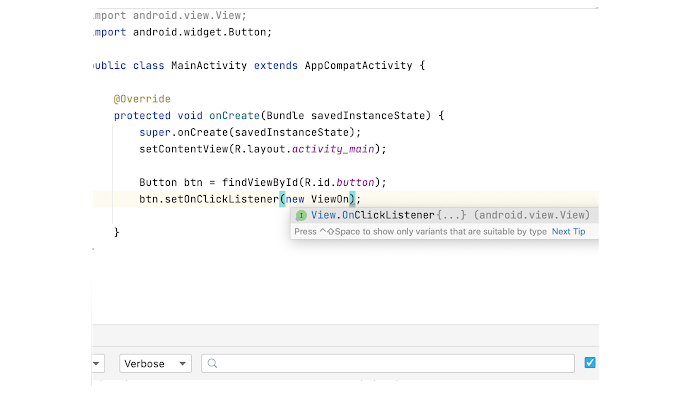
The setOnClickListener method takes a listener object as a parameter. Notice that as I try to create the anonymous class, Android Studio tries to offer help again.
This time, it’s guessing that I need a View.OnClickListener, so, out pops code completion hints again (as shown in figure 7).
figure 7. Code hinting for ViewOnClickListener
As soon as you complete the code for the listener object, write the code for the action you’d like to happen when the button is clicked.
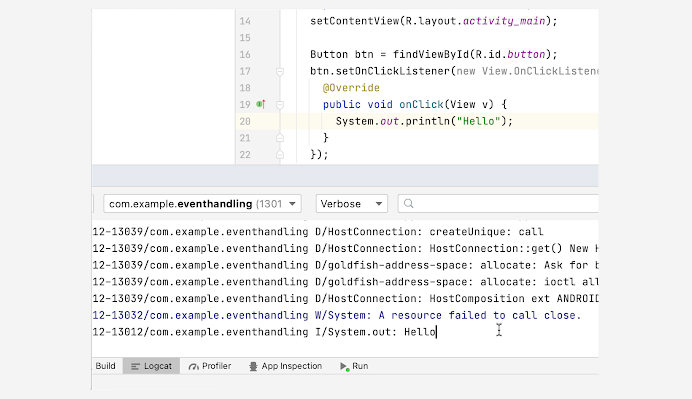
As for this example, we’ll just print a “hello” message to the Logcat window. Here’s the complete listing for MainActivity class (with the event handling routine).
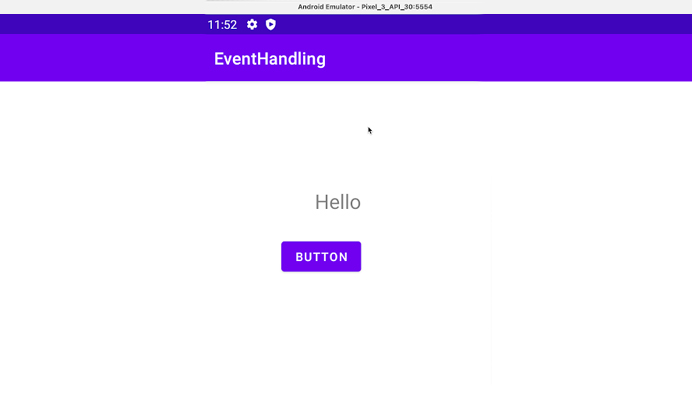
Now, to test this. Run the project on an emulator (figure 8 shows our app at runtime)
figure 8. our app at runtime
Then click the button.
Open the Logcat Tool Window — it’s on the tool stip on the lower right part of Android Studio. You should be able to see the output of the app (shown in figure 9).
figure 9. The “Hello” message in the Logcat window
Okay. Now that we know our code is working let’s complete the app. You didn’t think we put a TextView object in the layout for nothing? Did you? Of course not. Let’s get on with it.
Let’s make some more changes to the code. What we actually would like to happen when a user clicks the Button is to print “Hello” not on the Logcat window but on the TextView. To do that, we need to make the following changes;
Get a programmatic reference to the TextView object, like this
TextView txt = findViewById(R.id.textView);
Then, inside the onClick() method of the listener object, add the code to assign the string “Hello” to the text value of the TextView object; like this.
txt.setText(“Hello”);
The modified (and complete) code for MainActivity class is shown in the listing below.
In the previous section, we created the listener object by using Anonymous classes (the code shown below).
new View.OnClickListener() {
      @Override
      public void onClick(View v) {
      }
};
Notice the use of the new keyword? Without assigning the resulting object to anything on the left-hand side? Yup.
That’s how to create anonymous objects in Java. Anonymous objects are called anonymous because you cannot reference them anywhere else in the code — they have no name, that’s why you can’t refer to them.
You can only refer to them at the point of creation. If you want to be able to refer to your listener objects from anywhere in the code (at any time), you need to use named objects — which means you now have to define regular named classes to use as listeners; which is what we’re about to do in this section.
Let’s create another Empty project in Android Studio.
Like before, creating an Empty project generates a MainActivity class and its associated layout file (activity_main). Switch to the layout file, go to Design view, and then remove the default TextView.
Put three Button Views in the layout, like how you see it in figure 11 (below). Try to explore the design window.
If you select all three Buttons, then click the infer constraints button (the one that looks like a magic wand), you should be able to control the runtime layout of the Buttons.
figure 11. three buttons
Also, select the first Button and change the text attribute to read “ONE”. Do the same for Buttons 2 and 3; change their text to “TWO” and “THREE”, respectively.
The XML for code the layout file should now look like the listing below.
Take note of the value of the id attributes for each Button object — the one that reads “@+id/button” for button ONE, @+id/button2” for button TWO, and @+id/button3” for button THREE. We’ll refer to them by id later in our code.
Now, let’s switch to the MainActivity class to implement the event handler — and to do that, we will use an inner class. We will define a nested class within our MainActivity class.
The first three lines simply get programmatic references to the Button Views, then assign them to their respective variables.
Then we create an instance of the InnerHandler class — which implements the View.OnClickListener interface, which makes it a listener object.
The last three lines set the onClick listener of all three Buttons to an instance of our click listener (InnerHandler object).
If you run this right now, it should work already. If you click any button, you will see the “Hello Click” message on the Logcat.
What to do next? We will add some routing logic to the click handler object. Of course, we want to know which button was clicked. To do that, edit the onClick method of the InnerHandler class to match the following code (below).
@Override
public void onClick(View v) {
  String message = "";
    switch (v.getId()) {
    case R.id.button:
      message = "Button One";
      break;
    case R.id.button2:
      message = "Button Two";
      break;
    case R.id.button3:
      message = "Button Three";
      break;
  }
  Toast.makeText(MainActivity.this, message, Toast.LENGTH_LONG).show();
}
This code works because the Android runtime passes the instance of the object which generated the event to the event handler. So, in this case, if the user clicks button2, the runtime will pass the id of button2 to its designated click handler — which is an InnerHandler object.
So, if we add a simple switch statement (which we did), we should be able to differentiate which of the Buttons triggered the click event.
The complete (and modified) listing for the MainActivity class is listed below.
If you run our app right now, you should be able to see a different Toast message when you click each button.
This is an article under Acodes – coding article series from Acodez. You can read more coding articles here: ACodes Series
Acodez is a renowned web development company and web application developmentcompany in India. We offer all kinds of web design and Mobile app development services to our clients using the latest technologies. We are also a leading digital marketing company providing SEO, SMM, SEM, Inbound marketing services, etc at affordable prices. For further information, please contact us.
Looking for a good team
for your next project?
Contact us and we'll give you a preliminary free consultation on the web & mobile strategy that'd suit your needs best.
Jamsheer K, is the Tech Lead at Acodez. With his rich and hands-on experience in various technologies, his writing normally comes from his research and experience in mobile & web application development niche.