Building a minimum viable product (MVP) mobile app allows startups and entrepreneurs to validate their app idea quickly and cost-effectively.
Rather than investing significant time and money upfront in a full-featured app, MVPs focus on developing the core essential features that early adopters need. This lean approach gets your app to market faster, collecting user feedback and usage data to refine the product.
This complete guide will walk you through the key steps involved in building, testing, and launching a successful MVP mobile app. You’ll learn how to choose an idea, design a simple but usable MVP mobile app, develop the initial feature set, and validate your assumptions through real-world user testing.
Following an MVP approach reduces risk and boosts the chances that your app solves real customer problems. With the right planning and iterative development, your MVP can form the foundation for a thriving mobile product that meets market needs.
Now that we know the benefits of taking an MVP approach to building an MVP mobile app let’s dive into the critical first step – choosing the right app idea to test with your target users.
Here, we’ll explore techniques for generating potential ideas, determining if an idea is suitable for an MVP, and validating there is a real market need before moving forward.
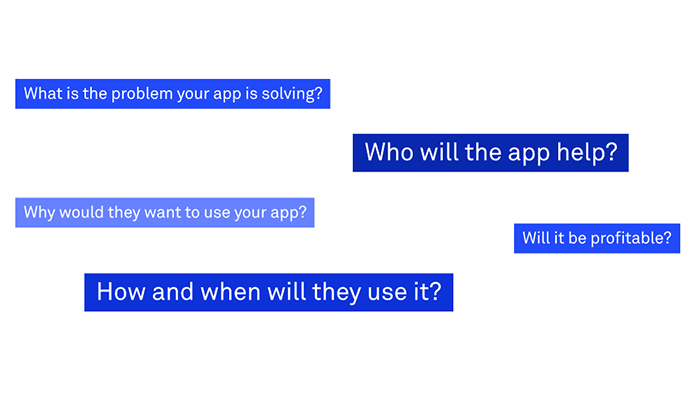
Coming Up With App Ideas by Solving User Problems
Problem-Solving Concept – Image Source: DECODE
The most important thing when coming up with an idea for your MVP mobile app is to focus on solving real problems or needs for a particular user group. Identifying an underserved audience and building an MVP mobile app that makes their lives easier in some way is key.
Start by thinking of pain points in your own life that could potentially be solved with an app. Or observe those around you to pinpoint frustrating experiences people have daily that could benefit from a digital solution.
You can also conduct market research through surveys, interviews, and focus groups to discover problems your target users face.
Some effective brainstorming techniques for generating app ideas include;
Browse app store categories to find gaps or areas lacking innovation. What common needs don’t have adequate solutions?
Identify areas where current app options are outdated, clunky, or expensive. Provide a better alternative.
Think of daily tasks or activities that could be optimized via an app for greater ease, speed, or efficiency.
Consider industries ripe for disruption by new digital technologies and mobile experiences.
Look for opportunities to adapt existing online services or software for more convenient mobile use.
Evaluating if an Idea is Suitable for an MVP
Once you’ve come up with some initial app ideas, the next step is determining if they are suitable for an MVP approach.
Some key criteria to evaluate include:
Solves a Critical Need – Will your app address users’ most urgent or important needs as opposed to nice-to-have features?
Targets a Specific Niche – Is there a defined target group that will derive exceptional value from your app? A narrow focus is best for an MVP.
Simple & Intuitive Concept – Can you explain the core purpose and functionality of your app in just a few sentences? Overly complex ideas don’t work well for MVPs.
Feasible for an MVP Build – Given limited resources, can you build just the essential features that will still provide value to early adopters?
Differentiated Value Proposition – What will make your solution unique from competitors and convince users to switch from incumbent apps?
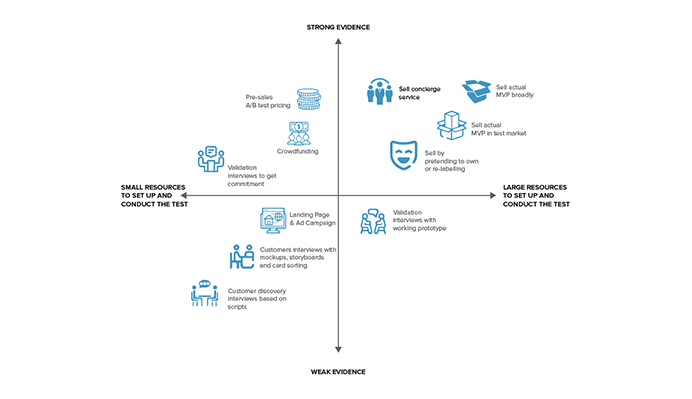
Conducting Market Validation
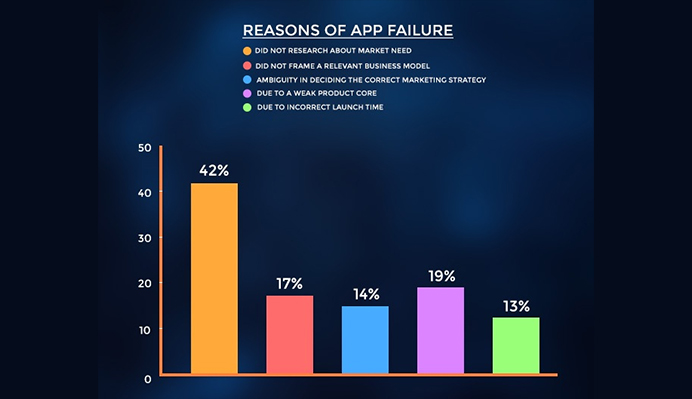
Once you have an idea for your MVP app, it’s crucial to validate that it solves a real market need before investing further, as a lack of market need is one of the main reasons that 42% of apps fail.
Reasons for App Failure – Image Source: Business of Apps
Some effective market validation techniques include;
Competitive Analysis – Thoroughly analyze competitors and existing solutions. Identify shortcomings your app could improve upon.
Interviews – Speak directly with your target audience. Have them walk through current pain points and get feedback on your MVP idea.
Surveys – Create simple surveys using free tools like Google Forms. Test demand for your app’s core concept and proposed features.
Landing Page Tests – Make a basic landing page explaining your app’s purpose and features. Run ads driving traffic to capture leads and measure conversion rates.
Focus Groups – Gather 5-10 people from your target market to discuss their needs and provide structured feedback on your idea.
The goal is to have at least 15-20 positive signals from real potential users indicating they would use or pay for your app before moving forward with development.
Refining Your Idea
Use the feedback and data gathered during validation to refine your MVP app’s feature set, branding, pricing, and messaging.
Identify the core features most requested by users to include in your initial release. You can always add more features later. Stay laser-focused on the essentials for v1 based on actual user input.
Properly validating your app idea upfront increases the odds of delighting users and finding product-market fit.
Designing the MVP Mobile App
After choosing an idea, the next step is designing a simple but usable MVP app. This process entails determining core features, keeping the feature set minimal, creating user flows and wireframes, and focusing on user experience.
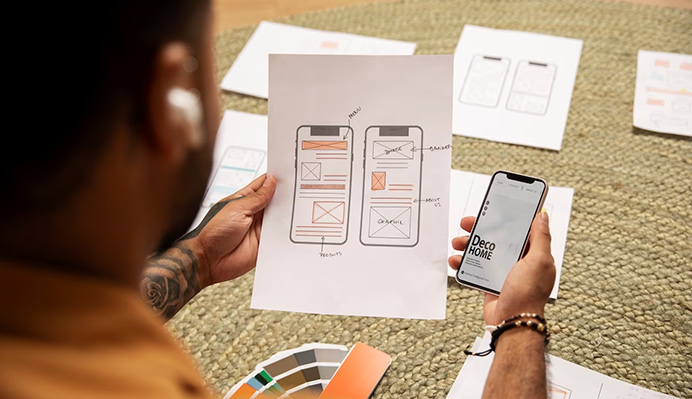
Determining the Core Functionality
Determining Core Features Concept – Image Source: Freepik
The design process for an MVP app focuses on identifying the core, must-have features to build for your initial release. Resist the temptation to include every feature you can imagine right away.
Prioritize the functionality that addresses the top user needs and problems identified during validation. Also, incorporate features that are critical to your long-term business model.
Some best practices for determining MVP features:
Review feedback from surveys and interviews. Include features users specifically requested.
Focus on the 1 or 2 app capabilities that will provide the most value to users. Do those very well.
Identify features needed to demonstrate your value proposition and differentiate it from competitors.
Consider which features can provide useful metrics on user engagement once launched.
Add features required for basic functionality like user accounts, payments, core workflows, etc.
The more streamlined your feature set, the faster you can build, test, and iterate your MVP.
Keeping the Feature Set Minimal
Once you’ve identified the must-have features, be extremely selective about adding secondary capabilities or bells and whistles in your initial release. Avoid feature creep at all costs. Fancy features can come later.
Some tips for avoiding excessive features:
Set a maximum number of core features based on the development timeline/resources. Limit to 5-7 tops.
Pretend your dev budget is only 10% of the actual. This forces you to pare down to essentials.
Write each feature on a note card. Sort by priority. Eliminate the bottom half.
Focus on building depth into a few critical features rather than shallow breadth across too many.
Have both devs and business stakeholders vote on which features to cut.
The elemental v1 feature set of your MVP is intended only to demonstrate core value, not be a full-fledged product. Release early, then improve.
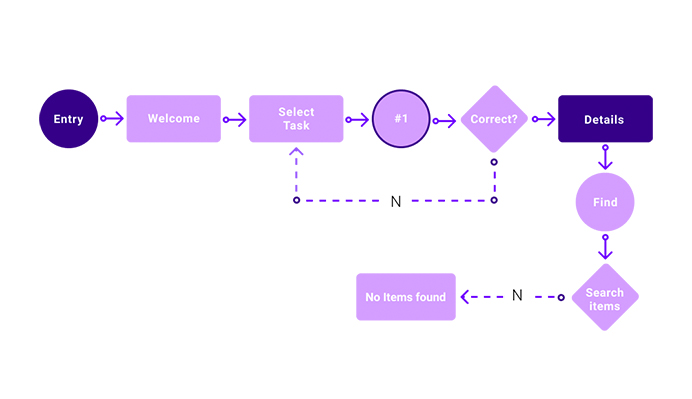
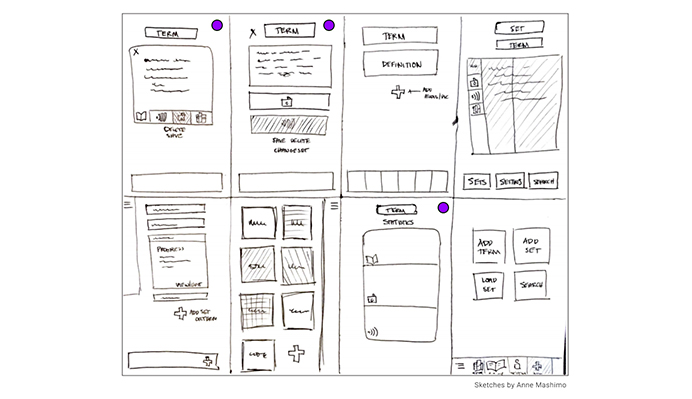
Creating User Flows and Wireframes
As seen in the two illustrations below from CareerFoundry, user flows map out the step-by-step actions users take to complete key tasks within your app. Wireframes, on the other hand, visually depict the user interface layout and content structure.
Building user flows and wireframes forces you to simplify and determine exactly how users will interact with core features. This upfront planning makes development much smoother.
Some tips for effective user flows and wireframes:
Map flows for 1-2 main tasks or use cases. Avoid mapping out the entire app.
Use sticky notes to brainstorm flow steps before creating digital diagrams.
Create low-fidelity wireframes focused on content structure and priority, not visual design.
Test flows and wireframes with real users to identify sticking points before writing code.
Well-planned user flows, and wireframes ensure you are designing for ease of use from the start.
Focusing on User Experience and Interface Design
For MVP apps, prioritize usability and simplicity in the UI/UX design. The advanced visual design comes later. To engage users from the start:
Choose a minimalist, clean interface style to spotlight the core features.
Use familiar UI patterns and intuitive navigation modeled on popular apps.
Apply principles of mobile-first and responsive web design for accessibility.
Check that key site pages/app screens are accessible within 1-2 taps/clicks.
Use brief, descriptive text and headers so features are self-explanatory.
A frictionless user experience in your MVP will help demonstrate the value of the product features themselves.
Building and Developing the App
Now that we’ve covered design let’s explore the key steps involved in actually building and developing the MVP mobile app.
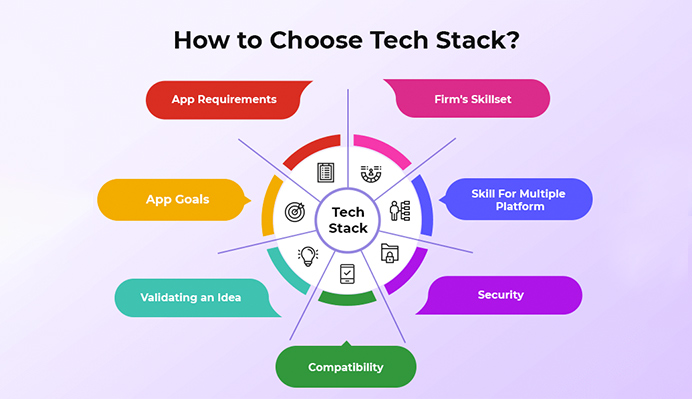
Choosing the Tech Stack and Tools
The technology decisions you make when building an MVP mobile app will impact the speed and efficiency of development. Assess your options carefully based on the project requirements and team skills, the compatibility as well as the security of the technology.
How to Choose the Tech Stack – Image Source: OpenXcell
Some popular platforms and tools for building an MVP mobile app:
Native Development – Swift/Objective-C for iOS, Java/Kotlin for Android. Gives full access to device capabilities.
Cross-Platform Frameworks – React Native, Flutter, Ionic, etc. Code one app for iOS and Android. Faster development.
No-Code Tools – App builders like Appy Pie, AppInstitute, and AppSheet. Quick and easy but with limited features.
Web Development – HTML, CSS, JavaScript. Can build a progressive web app accessible across devices.
Also, consider third-party APIs you can leverage for things like payments, chat, storage, and backend database needs. This will accelerate development.
Setting Up the Development Environment
Once you’ve finalized the tech stack, ensure your team has the necessary software installed to start building:
IDEs – Xcode for iOS, Android Studio for Android. Visual Studio Code is popular for web/cross-platform.
SDKs and languages – iOS SDK, Java/Kotlin SDK for Android. Plus, any frameworks like React Native.
Prototype/Wireframing Tools – Figma, Sketch, and InVision for mockups.
Version Control – Git, GitHub for managing code and team collaboration.
Project Management – Trello, Jira, and Asana to track tasks and progress.
Take the time upfront to set up a streamlined dev environment. This makes the actual coding and build process smoother.
Coding the Front-end UI
With the foundations in place, developers can start bringing the MVP mobile app to life by coding the front-end UI:
Build screen templates from wireframes for consistency.
Focus on core app navigation and workflows.
Code the visual layouts and UI components.
Make sure the UI is responsive across device sizes.
Implement clean, simple aesthetics for MVP.
Add animations/transitions sparingly to highlight key interactions.
The goal is to rapidly build a functional UI for your chosen platform that wraps around the core features.
Integrating the Back-end and APIs
While the UI gives your app its face, you still need to hook it up to business logic and data by coding the back end.
Connect UI to APIs for data storage/retrieval, third-party services, payments, etc.
Build your own custom APIs if required capabilities don’t exist yet.
Use cloud platforms like AWS, Firebase, or Azure for speed.
Write back-end logic to power core app workflows and processes.
Ensure good response times – don’t let back-end bottleneck UX.
Cut development time by leveraging pre-built APIs whenever possible for non-core functionality.
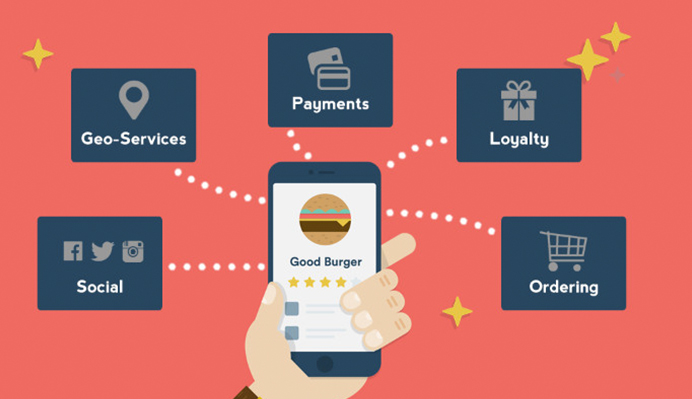
Implementing the Key Features
Some Key Features for a Restaurant’s Mobile App – Image Source: Linkedin
With the front-end UI and back-end now connected, focus on bringing your prioritized MVP features to life:
Start with the riskiest and most technologically challenging features first.
Write clean, maintainable, scalable code from the outset.
Comment code thoroughly for future understanding.
Follow agile methodology – build, test, and iterate in rapid sprints.
Conduct regular code reviews and testing throughout development.
Document the architecture and technology choices made.
Keep the end-user experience top of mind as you implement the features that will demonstrate the core value of your app.
Testing on Simulators and Devices
Throughout development, continuously test your MVP on both simulators and real devices to catch issues early:
Test on the iOS simulator and Android emulator first.
Try on multiple device sizes to check responsiveness.
Install regular app builds on test devices to trial flows.
Identify UI/UX issues and bugs quickly.
Verify connectivity with external services/APIs.
Check performance and load times on WiFi vs cellular.
Rigorous testing ensures your MVP delivers a smooth experience from day one. Fix issues now to prevent negative reviews later.
Before launch, your MVP app needs thorough testing to validate assumptions, discover issues, and collect user feedback for improvements.
Conducting Alpha and Beta Testing
Start with internal alpha testing with teammates, advisors, and other stakeholders. Gather feedback on flows, UI, and usefulness of features.
Next, conduct small-scale beta testing by releasing your MVP to a limited external group. Some best practices:
Test with 5-10 participants who match your target audience.
Provide specific tasks for testers to complete in the app.
Schedule remote or in-person sessions to observe them using the app.
Limit testing to core features and critical workflows.
Alpha and beta testing validate you are on the right track before releasing publicly.
Validating Core Assumptions
A primary goal of testing your MVP mobile app is to validate that it meets the core assumptions you set out to prove:
Test if target users understand and value the main features.
Ensure the UI/UX is intuitive enough for ease of use.
Verify your solution effectively addresses user pain points.
Confirm market demand and willingness to pay if relevant.
Review retention metrics to see if users return frequently.
If testing disproves your assumptions, you can revise strategies or features before investing further in full development.
Gathering User Feedback
Collect qualitative user feedback through;
Surveys – Ask rating questions and open-ended feedback.
Interviews – Probe specific issues uncovered during testing.
Reviews – Have testers leave App Store ratings and reviews.
Observing – Watch and take notes as users navigate the app.
Analytics – Review usage data like popular pages.
Feedback from real users is invaluable for refining and improving your MVP for public launch.
Identifying UX Issues and Bugs
Testing also surfaces UX flaws and technical bugs:
Observe points of friction where users struggle or drop off.
Note errors and glitches that occur. Log details for developers.
Check for broken links, formatting issues, crashes, or slow load times.
Ensure forms submit properly and key integrations work correctly.
Addressing UX and bug fixes makes for a polished user experience at launch.
Improving Based on Test Results
Use the quantitative and qualitative insights gleaned from testing to steer final iterations:
Identify lowest priority features to cut if needed.
Highlight navigation or workflows that need simplification.
Fix UI text that is unclear based on user confusion.
Resolve technical bugs that surfaced from field testing.
Add hints or tutorials where users need more guidance.
Validated learnings from real users take your MVP from good to great.
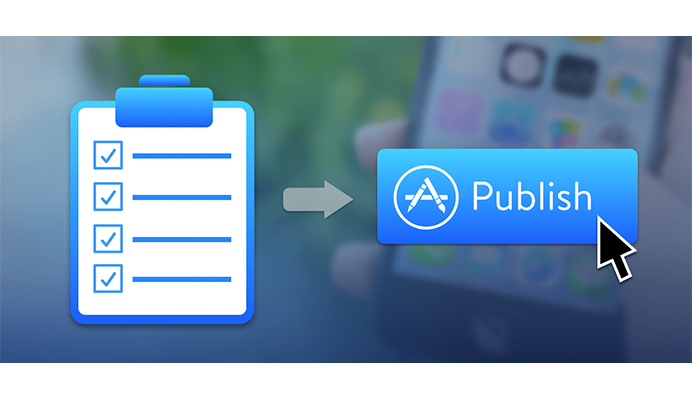
Launching and Iterating
Launch Your App – Image Source: MindSea
The final steps are launching your tested MVP, monitoring performance, gaining insights into user behavior, making improvements, and planning future enhancements.
Releasing Your MVP
When your MVP mobile app has been thoroughly tested and validated, it’s time to get it into users’ hands. You can:
Launch publicly in the app stores for the widest distribution.
Release to a limited test group or specific region to control scale.
Share with select customers or your email subscriber list.
Submit to beta app review sites like BetaFamily to build buzz.
Pitch to relevant bloggers and media outlets for the initial press.
A targeted, phased rollout allows you to monitor adoption and make any final tweaks before broad release.
Measuring Key Metrics
Once launched, closely track performance metrics to gauge traction:
Monitor daily/weekly/monthly active users to see retention.
Look at downloads and purchases if it is a paid app.
Review user ratings and App Store reviews for feedback.
Analyze usage data for popular features and flows.
Check conversion rates for key actions like signups.
These quantifiable metrics will reveal if your MVP is resonating with users and meeting business goals.
Gaining User Insights
Leverage analytics tools to understand user behavior better:
Use heatmaps to see tap locations and buttons users struggle to find.
Identify pain points where users exit or encounter errors.
See if certain user segments are more engaged than others.
Monitor social sentiment and mentions.
Survey users for ideas on new features or improvements.
These insights help you continually refine the UX and features.
Making Improvements
Use learnings from metrics and analytics to drive ongoing enhancements:
Fix nagging bugs or optimize poor-performing features.
Streamline confusing user flows uncovered by data.
Clarify help text for commonly asked questions.
Increase the visibility of popular but hard-to-find features.
Improve aspects with negative user feedback.
Iterate rapidly in the first weeks post-launch to smooth out issues.
Planning Future Versions
Finally, start a wishlist of new capabilities to build for v2 and beyond based on;
Most desired features users request.
Functionality needed for monetization.
Tools to capture more data on usage.
Ideas from team and advisors.
Latest innovations competitors have added.
Rapid iteration and planning will keep your MVP competitive and compelling for users long-term.
Conclusion
The MVP development process allows you to validate your mobile app idea before investing in full development. Focus on identifying real user needs, designing a simple but usable app, and building just the core essential features.
Thoroughly test your MVP with target users to refine the product before launch. Closely monitor metrics once released to plan improvements and future capabilities.
Following lean startup principles will help you gain market traction and ensure your app solves real problems for customers. With this foundation, your MVP can evolve into a successful product that meets user needs.
Acodez is a leading web development company in India offering all kinds of web design and development solutions at affordable prices. We are also an SEO and digital marketing agency offering inbound marketing solutions to take your business to the next level. For further information, please contact us today.
Looking for a good team
for your next project?
Contact us and we'll give you a preliminary free consultation on the web & mobile strategy that'd suit your needs best.
Rajeesh P.K. is the Director and Creative Head at Acodez . With an experience of 10+ years in UX Design & User Interface Design, when coupled with his expert coding skills in HTML5, CSS3 makes him one of the top UX Architects in India, with more than 15 international awards to his credit.