Server-side applications, specifically web services, used to be the exclusive province of the big boys (Java, C++, and .NET).
A web service is a software system that allows interoperable machine-to-machine interaction over a network. It’s inter-operable because these systems may interact even if they’re not written using the same software.
A couple of decades back, machine-to-machine interoperability was done with CORBA (Common Object Request Broker). It uses IDL (interface definition language) to facilitate communications between two different systems.
This was difficult to use. Then SOAP came along; SOAP is short for Simple Object Access Protocol. It uses XML to facilitate remote procedure calls. Many systems were built with SOAP, as it proved less tedious than CORBA.
Then, sometime in the year 2000, Roy Fielding invented REST (Representational State Transfer).
The purpose of REST wasn’t that different from its predecessor technologies; it still aimed to allow servers to communicate and exchange data anywhere in the world, but it differentiated itself by being a lot simpler to understand and use.
In this article, we’ll walk through the steps on how to use NodeJS to build RESTful APIs.
NodeJS, sometimes also called Node.JS or simply Node is a serverside side platform that lets you write backend applications using JavaScript.
In this article, I may use Node, Node.JS, or Node interchangeably; just keep in mind that I’m referring to the exact same thing, a JS server-side runtime.
If you’re used to languages like Java, C#, or PHP (all excellent server-side languages), you might balk at the thought of using JavaScript on the server-side. The truth is, Node isn’t the first platform to use JS on the server.
Netscape, back in 1994, tried this concept with the LiveWire platform. It’s the same idea; use JS on the server-side. LiveWire didn’t take off. NodeJS is the first platform to use JS on the server, which had real traction and following.
You can get Node for macOS, Windows, or Linux. The way you would get them will vary, depending on your platform.
A popular way of getting Node (among developers) is via the NVM (Node Version Manager). Using the NVM has the advantage of keeping different versions of Node on your machine.
This can be useful if you’re a developer that needs to support different versions of Node.
Installing Node via NVM requires the following steps;
Prepare your machine for NVM. It requires either the curl or wget utility
If you’re on macOS, you’ll need to install the XCode command-line utilities
On Linux, you’ll have to fetch curl or wget from the repos
Run NVM’s install script from the command line. The install script is found on NVM’s page (https://github.com/nvm-sh/nvm)
At the time of writing, the installer version is v0.36.0; this may change by the time you’re reading this. The best practice is to go to NVM’s website and copy the script from there.
Prepare Linux for NVM
The following instructions are for Debian and Ubuntu installations. You’re most likely using Ubuntu anyway; aren’t you? Launch a terminal window and run the following.
sudo apt-get update
sudo apt-get install curl
Then, install NVM. From the same terminal, run the following command.
When you’ve installed NVM, you can now get Node. Run the following command on a terminal. nvm install node
Installing on Windows
There is no NVM installer for Windows, not officially, at least. There is a similar node version manager you can use if you want to; it’s from Corey Butler.
You can download an installer for it on its GitHub page https://github.com/coreybutler/nvm-windows; but we won’t be using this; instead, we’ll walk through an installation of NodeJS using the binary installer.
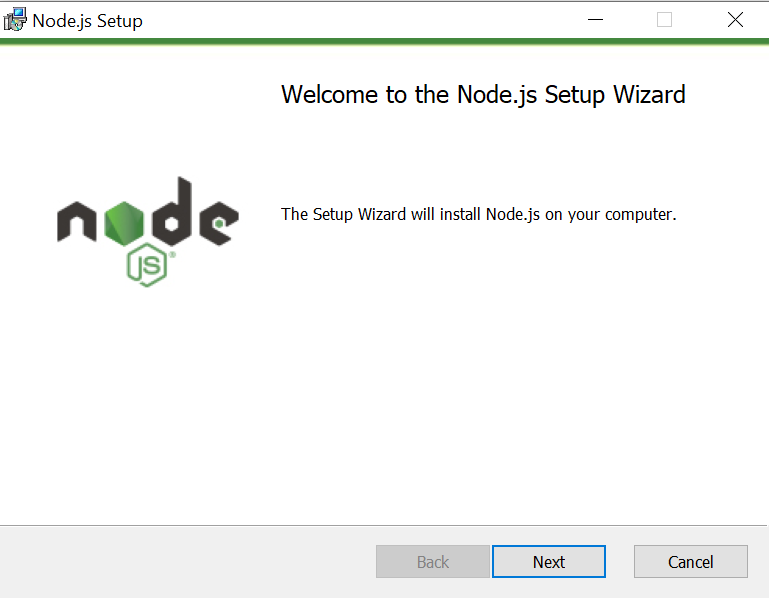
Go to https://nodejs.org to get the installer; when the download finishes, double-click it to start the installation. The greeting screen appears; click Next to proceed.
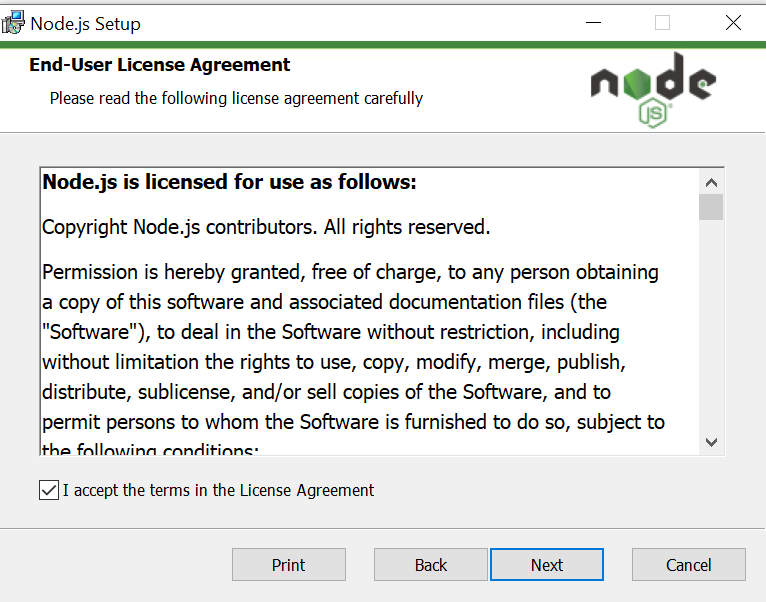
In the window that follows, read the license agreement, then click the box to signify your acceptance. Click Next to proceed.
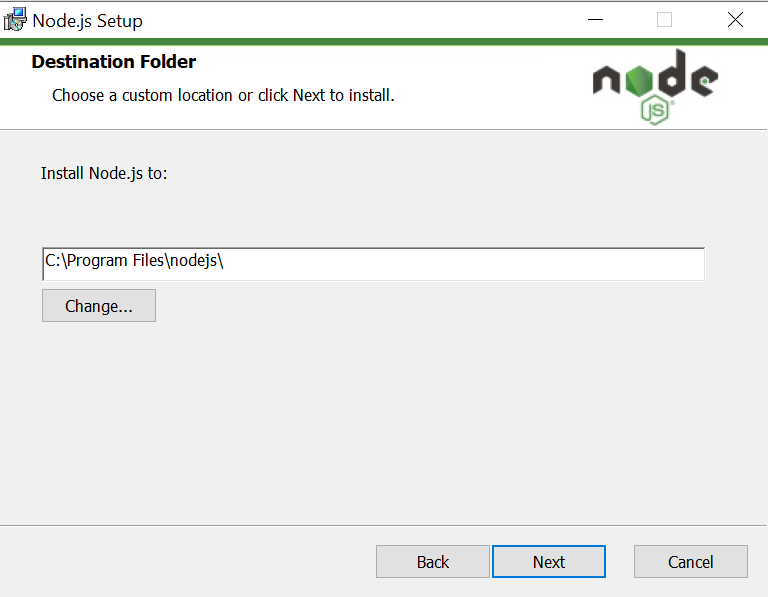
In the next window, the installer will ask where to install the executables, just accept the default.
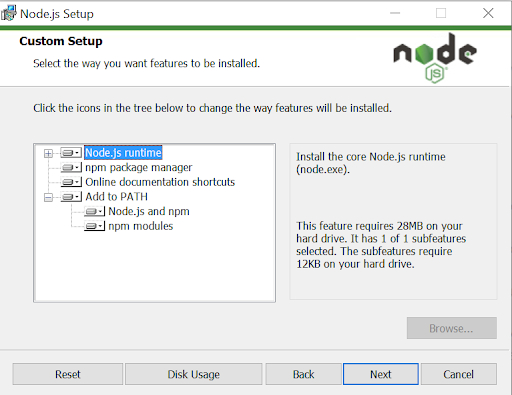
In the next window, you get to choose the features for installation. I suggest you review this screen carefully. Ensure that Node and NPM are Added to the PATH (Windows system path). Click Next to proceed.
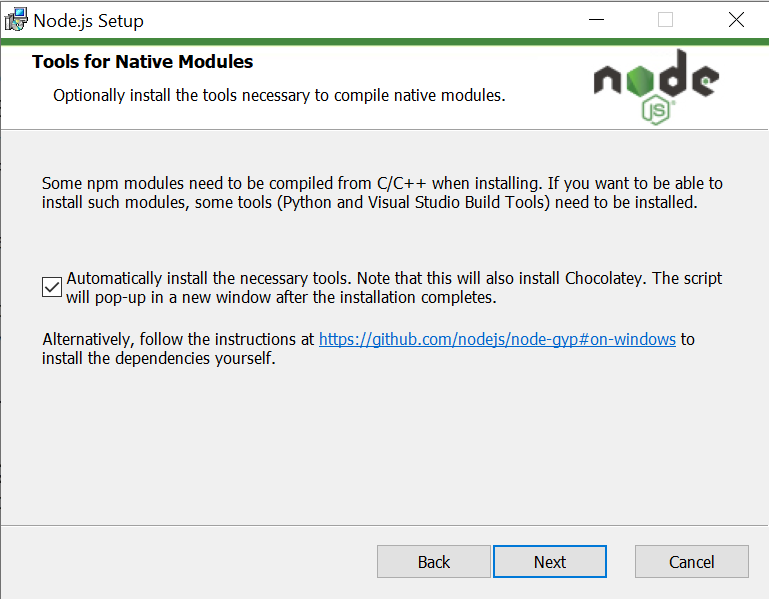
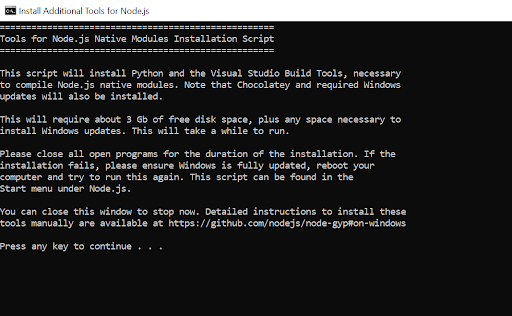
In the window that follows, the installer will suggest installing some optional tools for native module compilation; I recommend checking this box, then click Next to proceed.
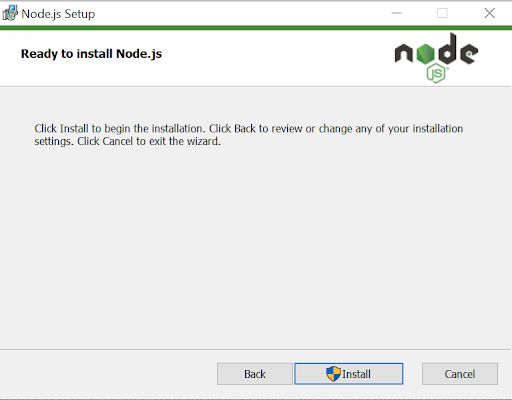
In the next window, click Install.
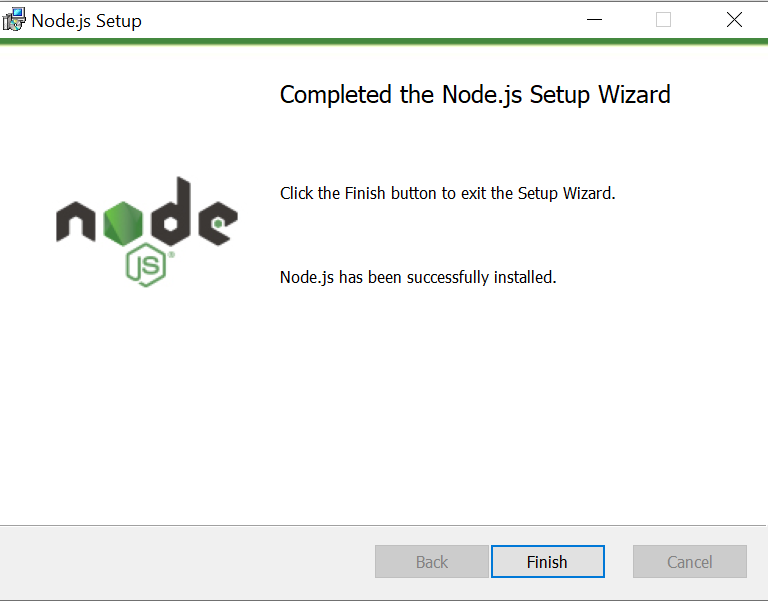
Windows will ask if you “want to allow changes to the device”, you should answer “Yes” to continue. In the window that follows, click Finish.
But you’re not finished yet; the installer will now perform the optional parts of the installation process. The installer will spawn a cmd window for the installation of native modules. Press any key to continue, as instructed by the installer.
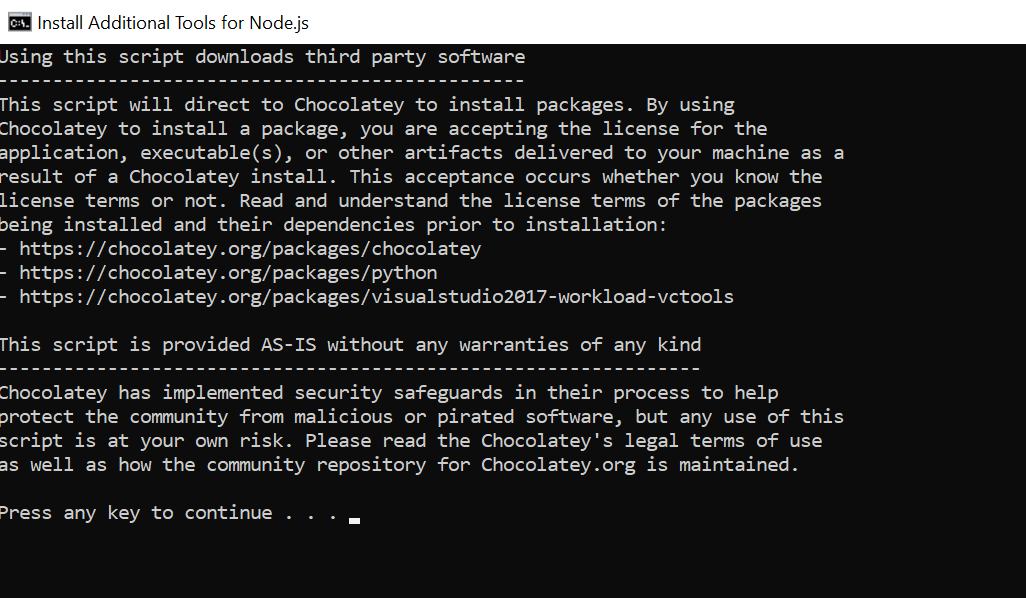
Once the installation for the native modules is done, the installer’s chocolatey part will kick in. Press any to continue (again).
Windows will once again ask for your permission if the installer can make changes to the system. Answer “Yes” to proceed.
The Windows Power Shell will open and proceed to install chocolatey (and the other tools).
That should take care of the installation (on Windows).
Testing NodeJS
Once Node is installed, launch a terminal or cmd window and run the following command
node --version
You should see the current version of Node. If you see something else, like “bad command or filename,” that means Node did not install properly.
Programming Tools
NodeJS programs are not complicated to develop and run. If you’re already doing browser-side JavaScript programming, then use whatever tools you’re already using.
Having said that, if you’re looking for recommendations, you can’t go wrong with Visual Studio Code. It’s free and used by many developers. Other editors to try would be Sublime, Atom, and Brackets.
The NodeJS REPL
NodeJS has an interactive REPL (Read Eval Print Loop); it’s a similar tool to the Console of the browser — you’ll see the Console if you press F12 on Chrome.
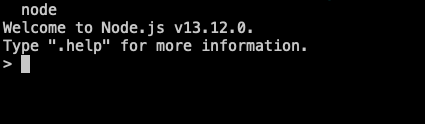
It’s an interactive environment where you can type JS expressions, and the results will be evaluated (and printed) immediately. To invoke the interactive environment, type the following on a terminal or cmd window.
node
You should see the following prompt
The chevron symbol is the Node prompt. It means it’s ready to take and evaluate commands. You should try it out. Try typing some arithmetic expressions, then press ENTER.
When you want to exit the REPL, you can either type the following
process.exit(0)
or simply press CTRL+D
Running Programs
NodeJS programs are written in JavaScript, but instead of embedding the script file in an HTML file, we run the script directly on the Node runtime.
To try it out, create a file named hello.js, then edit it to match the following code listing.
console.log(“Hello World”);
Save it, then, on a terminal window, run the following command.
node hello.js
If you didn’t have typing errors, you should see immortalized “Hello World”. By the way, please ensure that you’re typing the node command on the same folder where the hello.js script file is located.
Ryan Dahl created NodeJS; he presented and demoed it during the JSConf.eu in 2009. NodeJS was borne out of the creator’s frustration in the way applications were designed, specifically in doing I/O; consider the following code.
var result = db.query(“select * from tblCustomers”);
result.forEach(cust in Customers) {
  // process the results
}
console.log(“Finished”);
The code above isn’t real JavaScript, it may look like one, but it’s completely made up. The point of the sample code is to demonstrate the way many programmers think about I/O. Things are done sequentially.
If we were to translate this into an algorithm, it might read like this.
Query the database
Database goes to work, executes the SELECT query
Results are collected and returned to a variable
Each result is processed until we get to the last result
Print “Finished”
This is very straightforward. Most of us were taught to write codes this way. Ryan Dahl disagrees with this; that’s why he created Node.
The problem with this way of coding is that while the database is doing its work, the server app can’t do anything but wait for the results to come back. This is wasteful of valuable computing resources.
The way we should think about programs, according to Ryan, should be as follows.
db.query((result)=> {
  result.forEach(res in results) {
    //process the results
  }
});
console.log(“Finished”)
Algorithmically, it reads;
Query the database. When the results come back, process each result
Print finished
The latter version of our code does not wait for the database to finish fetching the results.
What it did was to give the database a callback function so that when the database finishes, the function executes, but in the meantime, our server is free to do something else.
Most of the libraries of NodeJS are written like this; so, we need to be very comfortable with callbacks.
What makes up NodeJS
Node is built using the V8 engine (Google’s V8 engine); it’s the same engine that powers JavaScript on Chrome browsers and Chromium-based browsers (Opera, Vivaldi, Brave, and Microsoft Edge); but that doesn’t mean our code executes on the browser.
Node contains lots of things, but the major ones would be;
V8 Engine (from Google). The same JavaScript engine that powers Chrome
libuv (Unicorn Velociraptor Library). An opensource project is written in multiplatform C. It provides support for I/O based on event-loops. This is responsible for the asynchronous capabilities of NodeJS
Core libraries. These are the built-in libraries of Node. Some of the included libraries are used for assertions, DNS lookups, HTTP, file compressions, etc.
NPM
NPM is short for Node Package Manager. While Node comes with tons of built-in libraries, NPM allows you to get more libraries that you can use in your apps; for example, if you need to install a library like ExpressJS, we only need to add it to our project, like so
npm install express
By now, you should realize that the above command is executed on a command line. The sample command above, specifically, should be run on the root folder of the project.
On the chance that you might create a library of functions, and you want to share it with the NodeJS community, you can also use NPM to publish that library; but we won’t cover that process in this article.
NPM is made up of three components:
the website – this is https://npmjs.com. Use the website to discover Node packages
the command line interface tool – use this tool to pull libraries from the repos. You can also use this tool to publish your libraries
the registry – this is a large public repository of JavaScript software. When you publish your library, this is where it gets stored
When you install NodeJS, NPM gets installed as well.
Node is different from its server-side tech counterparts because it’s very close to the metal. It’s different from Java, C#, or PHP in how it relates to a web server.
Typically, you’d create a serverside app (using Java, C#, or PhP), then you will deploy that app to a server, whether that be Tomcat, Apache, or NGINX. In Node, there is no server. Node itself is the server.
server.listen(port, hostname, () => { console.log(`Server running at http://${hostname}:${port}/`);
});
The preceding example is from the official web page of NodeJS. For quite some time in the past, this code was front and center on the NodeJS site. Let’s walk through the code.
The first line, which reads
const http = require(‘http’);
means we’re getting the http library (this is part of Node’s core libraries), and we’re assigning it to a variable which is also named http; we can name the variable something else, it’s not required that it’s the same name as the library, but in this case, it is.
By the way, the variable was declared as a const, which effectively makes it a constant — we won’t be able to re-assign any value to it later on.
The second and third lines, which reads
const hostname = '127.0.0.1';
const port = 3000;
are merely assigning values to the hostname and port constants.
is the meat and potatoes of this small server-side app. The createServer() function of the http object takes a function as an argument. This function will be called every time a client (an http agent, like a browser, for example) tries to connect to this server.
The createServer() function takes two arguments, the HTTP request, and response objects. These arguments are passed by the runtime when the function is called. The three lines inside the createServer() are explained below.
res.statusCode = 200; – We’d like to set the status code of the response object to 200, which means the HTTP request is a success. You can find the listing of HTTP response status codes in the HTTP RFC 7231 (Hypertext transfer protocols, semantics, and content) https://tools.ietf.org/html/rfc7231. You can find a less terse explanation of the codes here https://developer.mozilla.org/en-US/docs/Web/HTTP/Status
res.setHeader(‘Content-Type’, ‘text/plain’); – We’re setting the header of our response
res.end(‘Hello World’); – Finally, we’re sending textual data via the response object.
The last block of our sample code, which reads
server.listen(port, hostname, () => {
console.log(`Server running at http://${hostname}:${port}/`);
});
Starts the server and listens on port 3000; The third argument of the listen() function isn’t really necessary, but many developers put it anyway because it serves as a status to the server that it’s up and running.
If you want to test this code, edit our hello.js example earlier to match our web server sample code; then, run the following command on a terminal window.
As you can see, with some minimal codes, we can already build a very basic web service API.
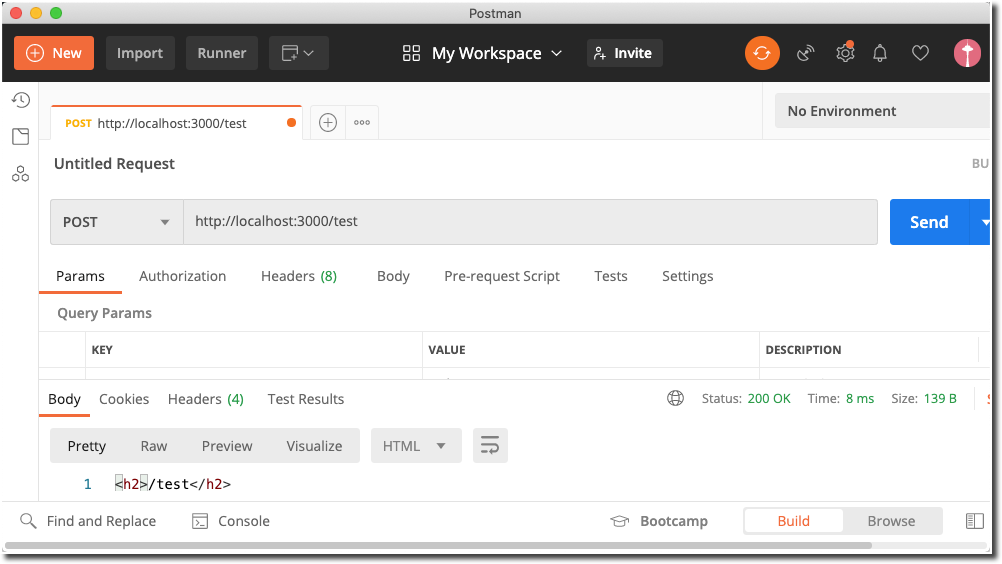
Let’s modify the hello.js further, edit it to match the following code listing.
const http = require('http');
const port = process.env.port || 3000;

const server = http.createServer((req, res)=> {
  let path = req.url;
  res.statusCode = 200;
  res.setHeader('Content-Type', 'text/html');
  res.end(`<h2>${path}</h2>`);
});

server.listen(port, ()=>{
  console.log(`Server listening on port: ${port}`);
});
There are a couple of cosmetic changes, but I’d like you to focus on the codes inside the createServer() method.
The first line of code, which read as follows
let path = req.url;
We’re getting the URL property of the HTTP request object; this property contains the actual URL that’s present when the HTTP request was made. This will be useful if you would like to route program logic depending on the URL of the request.
The next two lines inside the createServer() block should be familiar; we’re setting the status code and the headers of the response object; this time around, we’re setting the content type to html.
switch(method) { case 'GET': console.log('GET'); break; case 'POST': console.log('POST'); break; case 'PUT': console.log('PUT'); break; case 'DELETE': console.log('DELETE'); break; default: console.log('unknown'); }
res.end(`<h2>${path}</h2>`); });
server.listen(port, ()=>{ console.log(`Server listening on port: ${port}`); });
In this example, we’re saving the request.method property to a variable named method. The switch structure is routing program logic based on the method used at the time of the request.
To test this code, you can use the Postman tool (https://www.postman.com/downloads/). Postman is an excellent tool to have when developing a web services app.
By using the request.url and request.method properties, we can already build a basic RESTfult API; but we won’t do it like this. While our basic routing example is a good start for a RESTful app, there are better ways to build our app.
ExpressJS
ExpressJS (or simply Express) is a minimal and flexible web application framework. Many developers use it to organize their apps into an MVC-like structure (Model View Controller), but we will use it to build our RESTful API in our case.
Express is not a part of Node’s core modules, so we have to get it from the repo.
In our previous coding samples (routing.js and hello.js), we didn’t do proper housekeeping. We didn’t initialize the project NPM. Let’s do it now.
On a terminal or cmd window, type the following
mkdir firstproject cd firstproject npm init -y
The first two commands create a new folder for a project and then change the directory to that project. The third command initializes the project folder and makes it ready for an npm module. The -y flag means we’re answering “yes” to all the questions.
The npm tool also created a file called package.json in the root folder of the project.
Now we can pull the ExpressJS library. On a terminal window, type the following.
npm install express –save
The –save flag means we’d like to save this entry to the package.json file. The package.json file can keep a record of all the libraries you use in the project.
This is useful because if you want other programmers to download your project, they don’t have to download all the libraries you used.
They only need to download the source files and the package.json file. To reconstitute the libraries, they only need to execute the following command
npm install
After that, all the libraries you used for the project will be pulled from the repos.
Let’s go back to the project. Now that we’ve installed Express, it’s time to use it. Create a script file named server.js and modify it to match the following code listing.
const express = require('express');
const port = process.env.port || 3000; const app = express();
app.listen(port, ()=> { console.log(`Server is running on port: ${port}`); });
It should look familiar, it abstracted the createServer() function of our earlier examples; there is no more createServer() function; in its place is a code like as follows;
The get() method of the express object corresponds to HTTP’s GET method. It takes two arguments. The first argument is the path; in our example, we’re establishing a route to the document root.
The second argument is a callback function called upon when an agent connects to the document root using HTTP GET.
Express has methods that correspond to all HTTP methods; as you might imagine, there are post(), put(), delete(), etc.
Let’s imagine that we’re creating APIs to manage a book collection; of course, this will be completely made up and may not have legs to stand in the real-world, but it will do as an example. This is an exercise on how to use Express and Node. Let’s keep it simple.
We’ll need to support the following operations;
List all the book titles
List details of a single book
Add a book (book title, ISBN, Author, Price)
Delete a book
Edit a book
List all the Book Titles
To list all the book titles, we can use Express’ get() method, which corresponds to HTTP’s GET method. The resource is a collection of books (hence, plural). We can write that code as follows
app.get('/books', (req, res)=> {
// this is where you will write
// the logic to fetch the book records
// this call might come from a database
// for now, we're just mocking the result
let books = [
{ "booktitle": "War and Peace",
"isbn": "12349",
"author":"Leo Tolstoy",
"price": 29.99
},
{ "booktitle": "Huncback of Notre Dame",
"isbn": "14657",
"author":"Victor Hugo",
"price": 39.99
}
]
res.json(books);
});
Notice the last statement in the method? Express has decorated the response object; we don’t have to stringify our data structures anymore. You can use the json() method of the response to send back JSON objects.
You can test our code by launching the browser, then go to http://localhost:3000/books.
To list the detail of a single book, our endpoint needs to know the book’s id. For example, if we want to see the details of a book whose ID = 1001, we can pass the ID as part of the URL, like this
The ID (1001 in our example above) is called a route parameter. We can specify route parameters in Express like this;
app.get(‘/books/:bookid’, (req, res)=>{});
Route parameters are specified by placing a colon to the left of the parameter name. Let’s use this to write our second endpoint.
app.get('/books/:bookid', (req, res)=>{

  let bookid = req.params.bookid;
  console.log(`Book ID: ${bookid}`);
  // this is where we write the query to the
  // database to find the book
  // SELECT * from tableBooks WHERE bid = bookid;
  // for now, we mock the result again

  let book = {"booktitle": "War and Peace",
              "isbn": "12349",
              "author":"Leo Tolstoy",
              "price": 29.99
             }
   res.json(book);
});
To get the value of the route parameter, use the request object’s params property, like this
let bookid = req.params.bookid;
To test the code, go to http://localhost:3000/books/1001; actually, it doesn’t much matter whatever id you use since we’re simply mocking the result.
Add Book
To add a book, we will use Express’s post() method; however, we won’t be able to use the request object to extract the form payload straightforwardly. Form data is part of HTTP request’s body and its multi-part data.
If you try to work with form data with the help of any library, you’ll need to write some code that will deal with Streams — we don’t want to do that right now. We want quick and easy.
Luckily, we can use the body-parser library; so, let’s add it to our project. On a terminal window, run the following command.
npm install body-parser –save
To use the library in our project, we have to require it, then initialize it using the following codes.
After that, we can now use it inside the post() method.
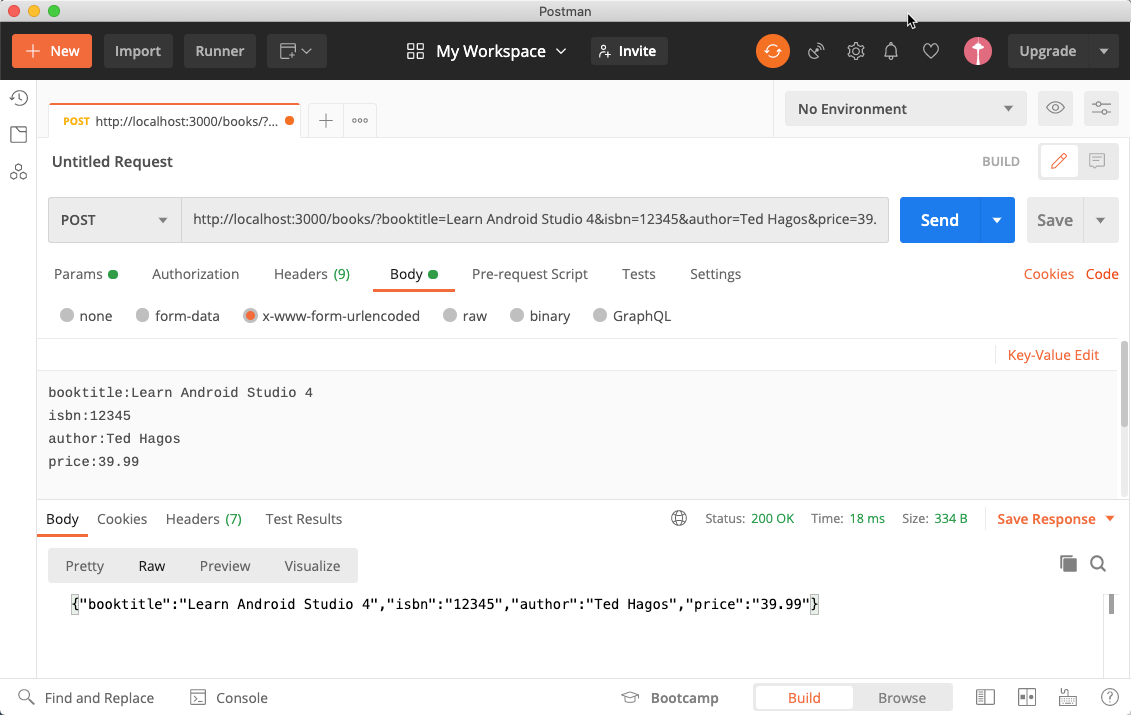
app.post('/books', (req, res)=>{

  let booktitle = req.body.booktitle;
  let isbn = req.body.isbn;
  let author = req.body.author;
  let price = req.body.price;

  let book = {
    "booktitle": booktitle,
    "isbn": isbn,
    "author": author,
    "price": price
  }
  console.log(book);
  res.json(book);
});
Ensure that your form’s input element’s name attributes are consistent with booktitle, isbn, author, and price.
If you want to test this using the browser, you will have to create a form. Alternatively, you can use Postman (https://www.postman.com/downloads/); it’s a handy tool when developing APIs.
Type the URL (http://localhost:3000/books). Then select POST in the dropdown (as shown above). Go to the body tab and choose “x-www-form-urlencoded”. Then provide the values for booktitle, isbn, author, and price (as shown above).
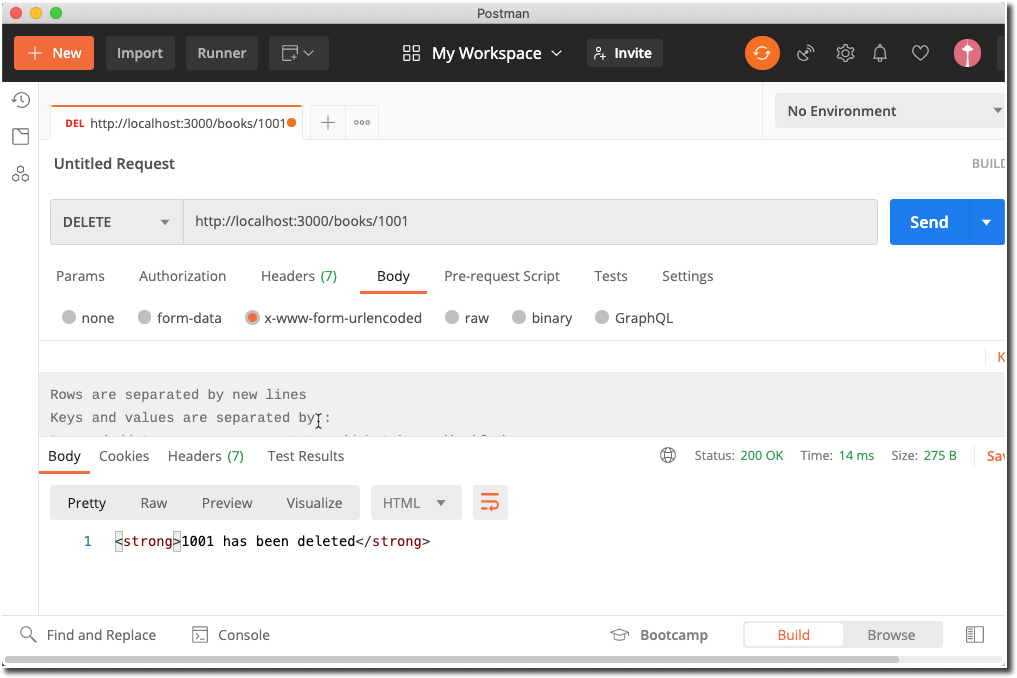
Delete a Book
The delete API requires that we pass the book ID to the endpoint. This is similar to our endpoint which lists the details of a single book; we will also use route parameters in here.
app.delete('/books/:bookid', (req, res)=>{
let bookid = req.params.bookid;
// DELETE from tableBooks where bookid=bookid;
// this is where you actually delete the book
res.send(`<strong>${bookid} has been deleted</strong>`);
});
You can also use Postman to test this endpoint
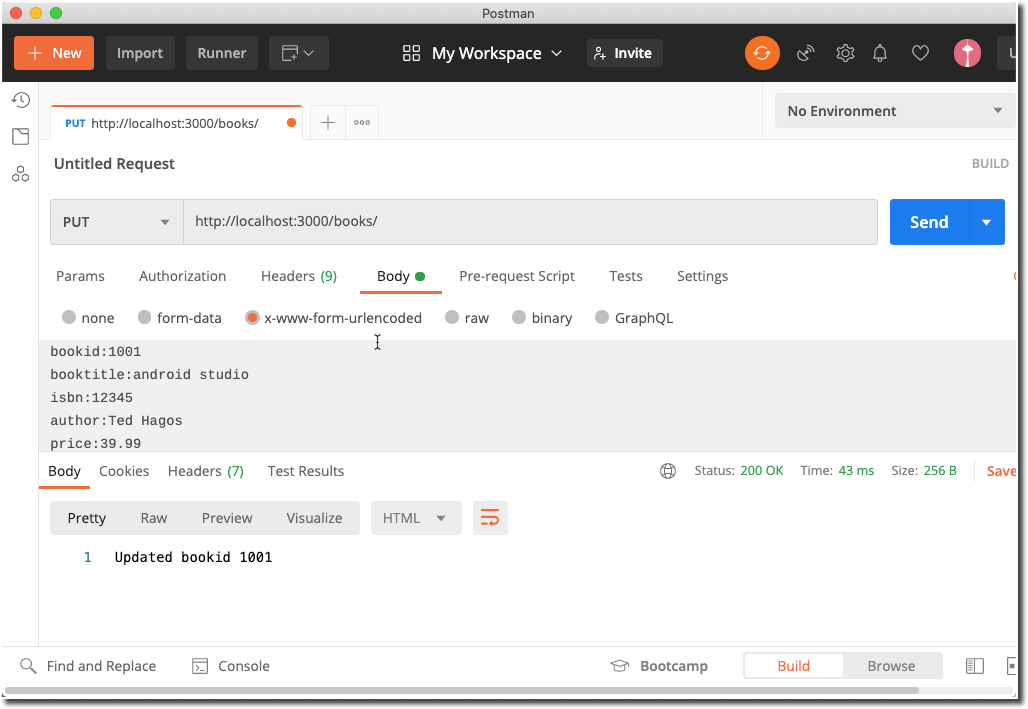
Edit a Book
To edit a book, we will use the put() method of Express; this method corresponds to HTTP’s PUT, which means the data on the HTTP request will be on the body; similar to the POST method. So, we will also use the body-parser library here.
app.put('/books', (req, res)=>{
  let bookid = req.body.bookid;
  let booktitle = req.body.booktitle;
  let isbn = req.body.isbn;
  let author = req.body.author;
  let price = req.body.price;

  // UPDATE tableBooks SET
  //     booktitle = ${booktitle},
  //     isbn = ${isbn},
  //     author = ${author},
  //     price = ${price}
  // this is where you actually write
  // the logic to update the underlying database

  res.send(`Updated bookid ${bookid}`);
});
CORS
We have to deal with the Single-Origin Policy of HTTP. Since we’re making an API, we have to assume that the consumers won’t be part of our domain. We have to allow Cross-Origin-Resource-Sharing (CORS).
To enable CORS in express, we’ll add the CORS library to our project; like so
npm install cors –save
Then, to use it, we’ll add the following code to server.js
const cors = require(‘cors’);
app.use(cors());
Putting it all Together
Now that we have all the pieces we need, we can put the code together. The complete code listing for server.js is shown below.
app.use(cors()); const port = process.env.port || 3000;
app.get('/books/:bookid', (req, res)=>{
let bookid = req.params.bookid; console.log(`Book ID: ${bookid}`); // this is where we write the query to the // database to find the book // SELECT * from tableBooks WHERE bid = bookid; // for now, we mock the result again
let book = {"booktitle": "War and Peace", "isbn": "12349", "author":"Leo Tolstoy", "price": 29.99 } res.json(book); });
app.get('/books', (req, res)=> { // this is where you will write // the logic to fetch the book records // this call might come from a database // for now, we're just mocking the result let books = [ { "booktitle": "War and Peace", "isbn": "12349", "author":"Leo Tolstoy", "price": 29.99 }, { "book title": "Huncback of Notre Dame", "isbn": "14657", "author":"Victor Hugo", "price": 39.99 } ] res.json(books); });
app.post('/books', (req, res)=>{
let booktitle = req.body.booktitle; let isbn = req.body.isbn; let author = req.body.author; let price = req.body.price;
let book = { "booktitle": booktitle, "isbn": isbn, "author": author, "price": price } console.log(book); res.json(book); });
app.put('/books', (req, res)=>{ let bookid = req.body.bookid; let booktitle = req.body.booktitle; let isbn = req.body.isbn; let author = req.body.author; let price = req.body.price;
// UPDATE tableBooks SET // booktitle = ${booktitle}, // isbn = ${isbn}, // author = ${author}, // price = ${price} // this is where you actually write // the logic to update the underlying database
res.send(`Updated bookid ${bookid}`); });
app.delete('/books/:bookid', (req, res)=>{ let bookid = req.params.bookid; // DELETE from tableBooks where bookid=bookid; // this is where you actually delete the book res.send(`<strong>${bookid} has been deleted</strong>`); });
app.listen(port, ()=> { console.log(`Server listening on port: ${port}`); });
In less than 100 lines of code, we managed to mock up a pretty complete set of REST endpoints for a single resource.
When it comes to the list of web development company India, Acodez ranks among the top companies. We offer all kinds of web design and Mobile app development services to our clients using the latest technologies. We are also a leading digital marketing company providing SEO, SMM, SEM, Inbound marketing services, etc at affordable prices We also offer Brandingsolutions to our clients. For further information, please contact us.
Looking for a good team
for your next project?
Contact us and we'll give you a preliminary free consultation on the web & mobile strategy that'd suit your needs best.
Jamsheer K, is the Tech Lead at Acodez. With his rich and hands-on experience in various technologies, his writing normally comes from his research and experience in mobile & web application development niche.